I really love making pincushions, so quick and cute. Mine is a little more quirky then the book version, but it feels very ‘me’ so I would say that’s a success! I used Essex linen in dusty blue and a few bright prints from my scrap bin. I read several years ago about stuffing your […]
|
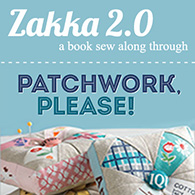
This post is part of the Zakka Style Sew Along, please visit here to catch up if you’re just joining us! ——————– Welcome to week 7! We’ve completed the first quarter of the sew along and today I have an extra prize to share! First take a peek at some of the magnets from last […]
This post is part of the Zakka Style Sew Along, please visit here to catch up if you’re just joining us! ——————– Welcome to week 6! (click on the picture to see who made each case) Each week there are so many adorable things you all have made, I wish I had room to feature […]
Slowly but surely, I’m catching up on sharing my finished Zakka projects. One down, 3 to go! Happy Friday! Lindsey
I am SO excited to have this little quilt done! When I started on it back in February, I wasn’t sure I would ever get it finished. I’m trying to make an effort to push through my WIPs, so I’m checking this off the list! Ali let me test out her Janome at the ATLMQG […]
loading
|
|
.jpg)

I
n
s
t
a
g
r
a
m
F
a
c
e
b
o
o
k
S
e
w
A
l
o
n
g
s

V
i
e
w
C
a
r
t
it’s so cute Lindsey! love the little changes you made. and the steel wool trick, i’ve gotta try that, my pins are all so horribly dull!
Very cute pin cushion! Thanks for the tip on steel wool. I have been looking for this exactally this tip.
Isn’t the steel wool sharp – looks lovely tho!
This is so lovely. It is amazing what a few of our favourite scraps can turn into. Nice work.
absolutely adorable!!!!!!!!!!!! great gift item!
Goodness that’s cute. Must get me some steel wool. I was wondering how to sharpen my pins.
Cool, love the wee ruffly bit
Nice to make something for yourself, eh? I use crushed walnuts for the stuffing – not sure whether it sharpens the pins, though, but it does a great job at holding them in place – nice, solid feeling.
Emory sand does the trick t00, but is quite a bit heavier!
Definitely going to have to try the steel wool trick…
Love how bright and cheery this is.. especially the sweet little ruffle!
Its so cute & the ruffle affect makes itvintage. Steel wool I heard that before, never tried it untul now. Im ready to put 2 together so thanks.
that is perfect!!
oh I like yours ALOT! very sweet.
Love it!!!! Always amazed with your eye for color and print combos!!!! So cool!
Very fun – and functional!
Arctelis like this just make me want to visit your website even more.
Your’s is the intelligent approach to this issue.